Decorating your roof with Christmas lights is one of the most effective ways to create festive kerb appeal. A well-lit roofline gives your home a warm, welcoming glow and instantly signals Christmas without needing excessive decorations. With a bit of planning and the right approach, you can achieve a professional-looking display while keeping safety and simplicity front of mind.
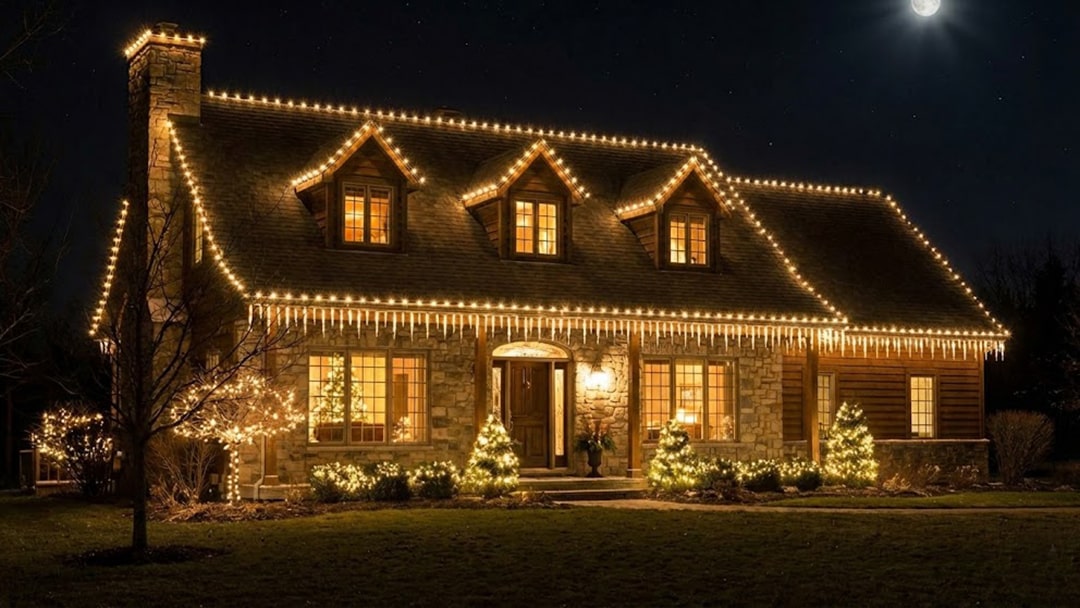
The first step is deciding on a lighting style that suits your home. Roofline lights are the most popular choice in the UK, as they clearly outline the shape of the house and look tidy from both the street and online photos. Warm white lights create a classic, elegant look, while soft multicolour lights add a more traditional festive feel. Icicle lights work particularly well along gutters and eaves, giving the impression of snow and adding depth without cluttering the roof itself.
Before installing anything, take time to plan the layout. Measure the length of your roof edges, including gutters, gables and porch roofs, so you buy the correct number of lights and avoid awkward gaps. It’s usually best to keep the design symmetrical and restrained rather than trying to cover every surface. Less often looks more polished, especially on modern or recently renovated homes.
Safety should always come first when working at height. Use a sturdy ladder on level ground and, where possible, have someone hold it steady. Avoid climbing directly onto the roof unless absolutely necessary, particularly on tiled roofs which can be slippery and fragile in winter conditions. Many roof lighting designs can be installed entirely from a ladder using clips and poles, removing the need to step onto the tiles at all.
Choosing the right fixings is just as important as choosing the lights. Always use purpose-made gutter clips, fascia clips or roof-edge hooks rather than nails, screws or adhesive. These clips are designed to hold lights securely without damaging gutters, fascias or roof tiles, and they make removal after Christmas quick and easy. Never tuck wires under tiles or lift roof materials, as this can cause long-term damage and leaks.
When it comes to power, outdoor-rated LED lights are essential. LEDs are energy efficient, brighter than older bulb styles and stay cool, reducing fire risk. Make sure all lights and extension leads are suitable for outdoor use and plug them into an RCD-protected outdoor socket if possible. Using a timer is a simple way to control when the lights come on and off, saving energy and ensuring they’re not left on overnight unnecessarily.
Weatherproofing is another key consideration. Check that all connections are sealed and raised slightly off the ground to prevent water pooling. Avoid running cables across walkways or driveways where they could become trip hazards or be damaged by cars. Taking a few extra minutes to secure cables neatly will improve both safety and appearance.
Once your lights are up, step back and view them from the street. This is how most people will see your home, and it’s the best way to spot uneven lines, sagging sections or areas that need adjusting. A clean, consistent roofline usually looks more festive than a display that’s overly busy or mismatched.
Finally, think ahead to removal. Keep the original packaging or label each set of lights as you take them down so storing them is straightforward. This will save time next year and help prevent tangles or broken sections.
Decorating your roof with Christmas lights doesn’t need to be complicated or risky. By focusing on a simple design, using the right fixings and prioritising safety, you can create a festive display that enhances your home and spreads Christmas cheer throughout the season.